Friday, November 7, 2014

Fall Seedlings

Bok choi
Fall in my Southern California garden means warm days with cool nights, and that is perfect for germinating the seeds for our winter vegetables. People say we don't have seasons in Los Angeles because we have perpetual sunshine. If you ask me, the seasons are obvious here. Fall is definitely in the air. 

Our summers are long, hot and dry. Last week we had the first rain of the fall, a welcome relief from months of dry weather. I really can't remember the last time it rained before that, but it was probably in June. Our poor plants accumulate a thick layer of dust and grime over the summer. They look dull, tired, sad. Then the first rain happens and an amazing transformation occurs. It's like taking a shower after camping for a week. Nothing feels as good as a nice shower. The whole world looks bright and renewed after the rain.

My timing was perfect. The seeds were planted and the rains came and the garden came alive!
Red Russian kale

Cilantro volunteer

Pea

Romaine lettuce, thinking outside the box.

Sweet peas, how I love sweet peas!

More peas

Sweet Bessie May, my gardening companion

Aroma therapy
Fall is in the air, even in LA.


Monday, November 3, 2014

Selecting the Best Plants at the Nursery

Not all plants are created equal. Here are some tips for choosing the best specimens at the nursery. While the photos here are of small plants in six packs, these suggestions can be applied to any type or size of plant.

First impressions. Obviously we are looking for robust plants with good form. 

Bigger is not always better. It is so tempting to choose the largest plant, but I tend to purchase young plants whenever possible. The longer a plant has been in the pot, the more likely it is to suffer from crowded roots and lack of nutrients. I usually look for the youngest (smallest) plants for this reason. I find that the nursery will often display the oldest (most root bound) plants toward the front while the newer arrivals are tucked toward the back or under the table.

Look at the leaves. Are there signs of disease? If there is any sign of mildew, rust, or any disease, I move on. I don't want to bring any of that into my garden, and the effected plants may not be as strong since they have been diseased already. 
Small holes that were created by insects don't concern me as much, as long as the insects have left. The damage has been done and if there are no more insects or signs of eggs then I'll overlook the tiny holes.
Look at the roots. Avoid buying plants that are root bound like this one.
If the roots have grown through the bottom of the pot, the plant growth has probably been stunted, and the plant will likely suffer from transplant shock as these roots will most likely be damaged when removed from the pot. At the nursery, I often will gently push the plant out of the pot to take a look at the roots, especially if the plants are potted in the small 6 packs like this celery.
The roots were starting to become crowded,
but with a gentle touch these roots can be easily spread, so I bought them.
If left another week, those roots would have been really tangled in those small spaces, and I would have left them at the store. 

These plants are at the ideal stage for transplanting. Their roots are established but not crowded.
 
Check their posture and stability. You want the plants to be stable in the pot, not falling over. These young plants are all growing straight and tall. 
One way to check their stability is to pick up the six pack and tilt it. If the plants flop over easily, they may not be planted deep enough. Look for another six pack with more stable plants.

Check for weeds. Look to see if there are weeds growing in the pot. No one needs more weeds in their garden and some potting soil may contain unwanted seeds. If one weed is growing, more may be on their way.

Look for signs of pruning. Inspect the plant to see if it has been pruned. Heavy pruning may indicate that the plant has been in the pot a long time, or that it is unhealthy and parts have died.

A careful inspection will ensure that you select the very best specimens for your garden.


Saturday, November 1, 2014

Ginger Green Beans with Cashews

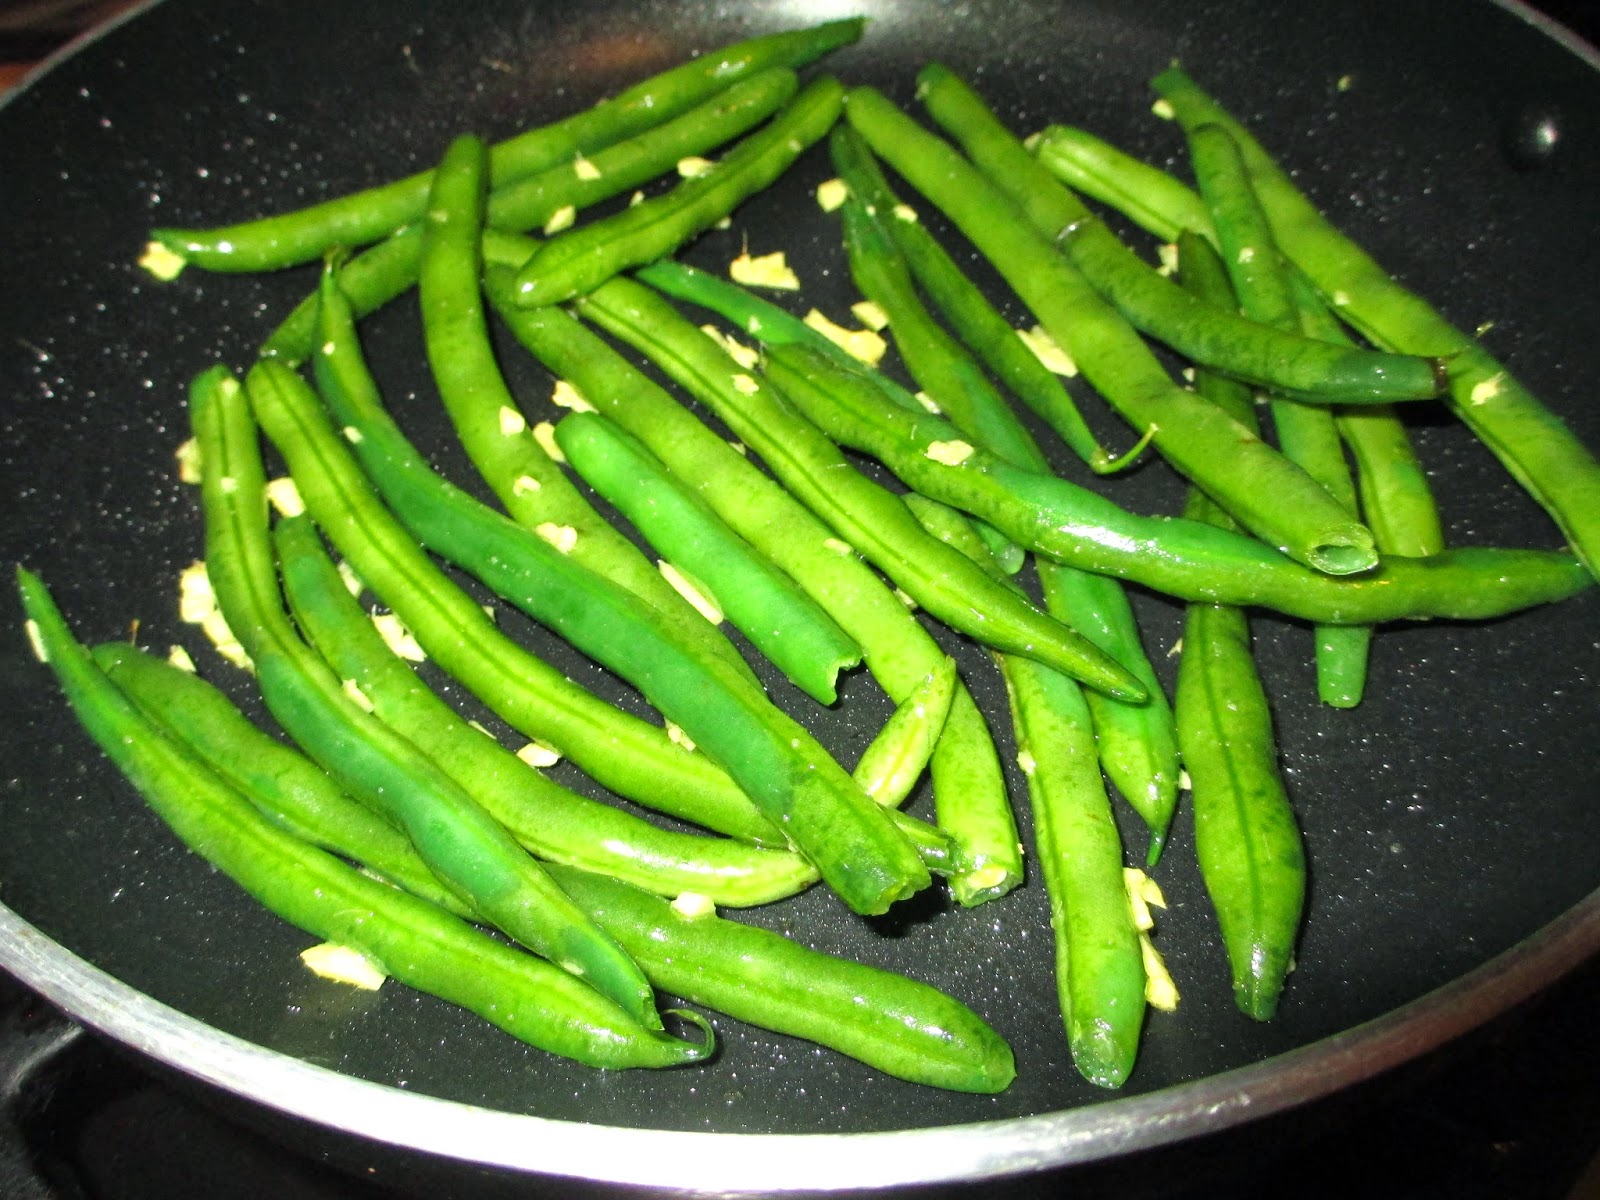
Sometimes the garden gives you delicious gifts such as these green beans that volunteered to sprout in my garden. I love it when that happens! My green beans were planted in succession. The harvest was wonderful but I had to pull the plants due to spider mites. I decided not to plant more then the volunteers appeared, and these plants faired much better. It seems the spider mites were bad during the early summer and not as bad in August/Sept. That's good to know for next year. I will continue to sow green beans until August, or maybe the volunteers will be back and save me the effort.

These vegan stir fry green beans are quick and easy, with added protein from cashew butter and cashews. You could easily substitute peanut butter or another type of nut. I enjoy the cashews because their sweetness combines well with ginger. 

I love ginger. It finds its way into my food because it is delicious but also because of its anti inflammatory and anti nausea benefits. I recently planted ginger in my garden for the first time. Read more about growing ginger and its health benefits here. 

I apologize that there are no exact measurements with this recipe, I just sort of estimate how much to add. It's the "add a little of this, and a little of that" approach to cooking that I learned from my husband who is a gourmet cook. He taught me to cook. I'm a lucky girl.

1 tablespoon Peanut Oil, or substitute another type of oil such as olive.
Green Beans a couple of handfuls, rinsed, dried then cut if desired.
1/2 to 1 tablespoon Ginger, peeled and minced. The more, the spicier.
2-3 tablespoons Cashew Butter 
1 tablespoon Soy Sauce
1/3 Cashews, coarsely chopped
1/4 cup Cilantro, coarsely chopped, plus one sprig for garnish.
1 tablespoon Sesame Seeds

Heat the oil over medium heat. 
Add the ginger and stir for 3-4 minutes taking care not to burn it. 
Add the green beans and stir another 3-4 minutes until the beans are slightly cooked. I like mine to be al dente.
Push the green beans to the edge of the pan and add the cashew butter and soy sauce to the center of the pan.
Stir the soy sauce into the cashew butter then mix it with the green beans to coat them.
My apologies for the poor quality of these photos. I have yet to develop the ability to take nice pictures without burning the food.
Add the cashews and stir fry another 2 minutes to heat the nuts.
Remove from the heat and place in serving dish.
Sprinkle with sesame seeds and cilantro, then garnish with a sprig of cilantro.
Now let's have a toast to the volunteers. "Cheers!"


Thursday, October 30, 2014

Joshua Trees Against Blue Sky

Joshua Trees against blue sky are rugged beauty. They offer tranquil shade in the harsh climate of the Southern California high desert. Here the dry desert air is stifling in summer. However this time of year, the warm dry air is peaceful yet it's powerful enough to remove loads from shoulders. Sitting in the quiet is a welcome relief from the steady noisy hustle of city life. Listening to the silence out in the desert is a fabulous stress reliever. The Joshua trees thrive here, like characters out of a Dr. Seuss book, they stand in frozen poses. 
This is the view from Dad's back porch. Who can blame my parents for moving from the city to this picturesque desert?
This territory has been made famous by Joshua Tree National Park which attracts visitors interested in rock climbing, hiking, and camping. It is home to my father, a Nebraska farm boy turned high school teacher/football coach. Sadly, my mother passed away several years ago but she enjoyed many years of leisure in their desert sanctuary, creating quilts and growing roses despite the harsh climate. I recently visited my father and took some photos of their property and the interesting plants to share with you.
Joshua tree, Yucca brevifolia
This beauty is in my parents' front yard. Joshua trees do not have growth rings like other trees so their age is estimated by their height. They are said to grow roughly 1/2 inch per year, and this one is probably 25 ft tall so it's around 50 years old.

They grow from a seed but perfectly timed rains are required for germination and many years can go by without the right conditions, so they grow sparsely.
This is a Joshua tree forrest.
Joshua trees have tough spiky leaves which are as sharp as they appear.
Their leaves were used by Native Americans for weaving baskets and making sandals. If the conditions are just right, blossoms will appear. They are white and grouped in clusters. The dried flowers are seen at the top of this plant.
Because of their unique climate requirements, there are few places where Joshua trees are seen. They grow in Western Arizona's Sonora Desert, and in Southern California in the Mojave Desert and the San Bernardino Mountains.

Here are some of the other interesting plants in my parents' "yard".
Desert bird of paradise with her false eyelashes.
"Touch me, I dare you!"
Dainty wildflower
Oleander
Tiny wildflowers reminiscent of marigolds
Notice the red rose growing next to the Joshua tree? That is my mother. She's with me as I take these pictures, in my heart as always. She was many many things, in fact she was everything to me, and she was a lover of roses. She planted them, nurtured them and cut them as soon as they bloomed. They were spread throughout the house and brought her such joy. We used to laugh that no rose was left alone outside in her garden. Look at these beautiful roses blooming in late October.
What a treat it was to time my visit when the roses were blooming. It was a wonderful weekend spent with my dear dad as he prepared for his trip.

Dad is taking off to hunt ducks and catch fish, leaving the Joshua trees behind. He does get some strange looks driving down the road with the boat on top of the truck. 
Happy travels, Dad!


Wednesday, October 22, 2014

How to Divide Perennials

Dividing perennials allows you to separate one plant into two or more smaller plants. It's a great way to propagate new plants from the existing ones in your garden. It's also useful in rehabilitating a clump which is too crowded, or a clump which has an unhealthy center. Not all plants can be divided, but this works well with plants whose roots form "offsets", or smaller plants growing at the base of the larger plant. 
You can see in the picture above that this coreopsis clump is actually made up of many smaller plants. The roots may be connected, but the plants can be pulled apart and transplanted. The list of plants which can be propagated this way is very long and includes asters, violets, coneflower, hostas, yarrow and daisies. 

My coreopsis was planted in the corners of some of my vegetable beds to attract bees and other pollinators.
Clearing my beds to make room for my winter garden meant that the coreopsis had to be moved. The clump had suffered toward the end of summer and was not looking very happy with its dry leaves.
To divide the plant, first dig it up and gently loosen and untangle the roots.
Using my fingers, I tenderly pulled apart the plant into 4 pieces, each with at least 3 growth buds and roots attached.
My soil is light and these plants came apart easily. If your soil is more compact or if the plant is large, you may not be able to separate the clump by hand. In that case, use a trowel or shovel to slice the clump into sections.

These four coreopsis plants were transplanted into our empty area next to the fence. 
I sowed wildflower seeds in the empty area and sweet peas near the fence too, so this spring it should look lovely.
When transplanting, dig a hole big enough to allow the roots to be spread out. Bury the plant to the same depth it was growing before. It should end up with the crown even with the surface of the soil.
If the plant will be hand watered (as opposed to a soaker hose), I find it is helpful to create a raised mound around the plant. This keeps the water from running off, and directs the water to the roots.
Fall is the ideal time to divide and transplant perennials because the soil is still warm but the nights are cool. This encourages the plant to put effort into growing roots instead of leaves. The plant will rest over the winter, then when spring comes, the plant will already have a strong root system. It will be ready to grow and flower, attracting those busy bees.