Showing posts with label planting tips. Show all posts

Monday, March 9, 2015

My Experience with Newspaper Pots

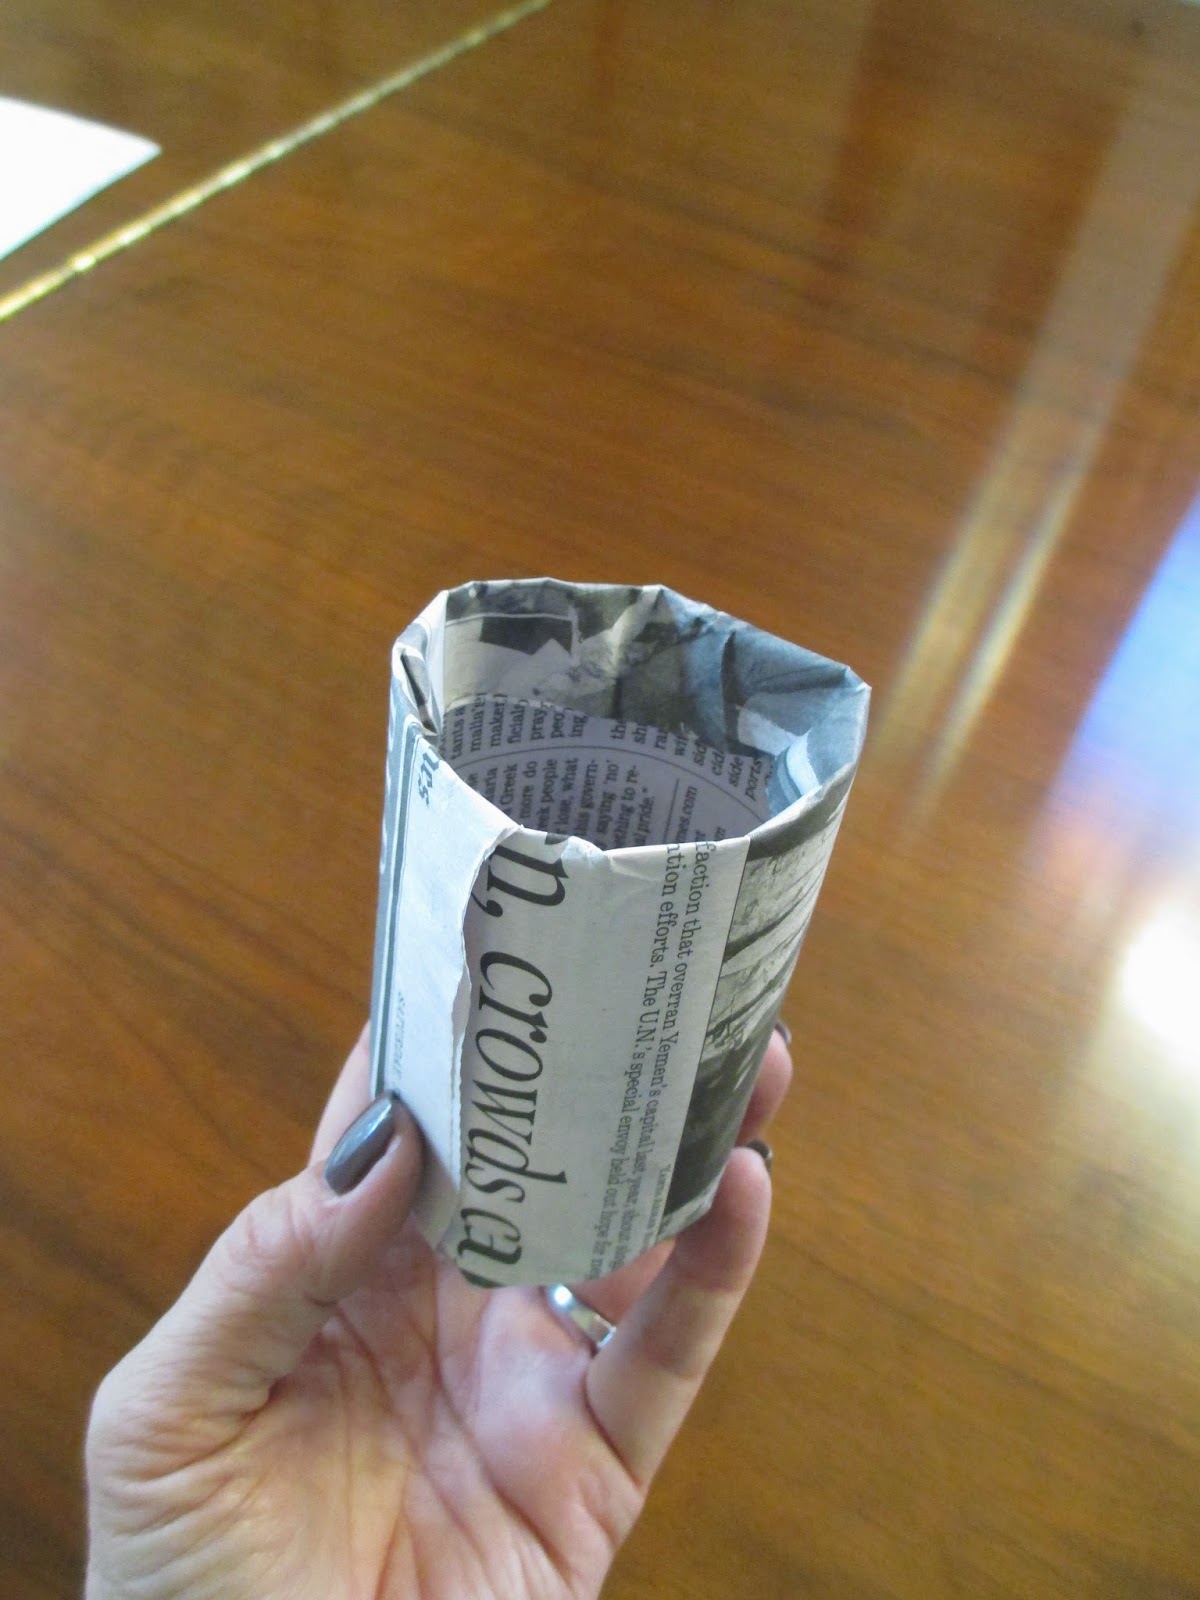
My rookie season of indoor seed starting has been a struggle. My first batch of seedlings damped off. They died of too much water, and because I didn't disinfect my recycled plastic six pack containers. I tossed them in the garbage and tried again. After doing some more research I decided to plant my second batch of seeds in newspaper containers. They are easy to make and I had basically all of my seeds germinate. The seedlings look fantastic and all was well...

Then I noticed some type of gray mildew-looking stuff had started growing on some of the little paper pots. It started at the edge and grew toward the stems.
I asked my local nursery woman and she said it is impossible to tell if it is a beneficial organism or a destructive one. Luckily I didn't have plans for my day yesterday because it turns out it takes a long time to repot 100 plants into red plastic cups.

I gently removed the damp newspaper and scraped off the top soil, then repotted them in potting soil. I noticed that the seedlings that had 2 sets of true leaves had roots which were already starting to penetrate the newspaper. It seems that if you left the seedlings in the paper pots, there may come a time when removing the paper pot would damage the roots. The pots can be place directly in the ground but that gray creeping stuff looked suspicious to me and so out it went.

The Solo plastic cups were rinsed, then I used a nail to poke holes in the bottom. I found it worked best to do 2 cups at once because they were more stable and less likely to collapse and crack. I didn't need a hammer, just used thick gloves and pushed the nail through.
I used a sharpie to label the cups and watered the seedlings thoroughly. 

We have had the most glorious weather the past few days so the seedlings were outside all day. I tell you, Southern California plants have it easy when it comes to the hardening off period. It's not such a shock to go from a 74 degree house to an 80 degree day. Under the patchy shade of our arbor, they had intermittent sun and there was not one casualty. They all made it, even the ones which were just germinating. 

Today they spent the day outside and after one more night indoors I think they'll stay outside. The garden beds are ready. I'm ready. Now the plants need to get a little bigger and into the garden they will go! 

Fingers crossed!


Thursday, March 5, 2015

Second Time's a Charm? Starting More Seeds Indoors

My fingers are crossed that my second batch of seedlings will fare better than the first. Being a rookie means sometimes making a rooking mistake. This is the first year I have tried to start seeds indoors under grow lights. After reading several articles I decided to disregard the advise that was given in each and every article I read. I decided not to disinfect my plastic six pack containers. I barely rinsed them off, and my seedlings paid the price. They damped off, dead as a door nail. Beside using dirty trays, I also think my seedlings were over watered. That definitely contributed to the fungal problem that causes damping off. 

I had to start over, determined to get all those fabulous heirloom seeds to grow. Back to the internet I went, and after further research I decided to make seed pots out of newspaper instead of trying to disinfect my plastic trays. 
Unlike plastic, the newspaper allows the soil to "breathe" which is healthier for the plants. Seedlings like to be moist, but not soggy. I learned that lesson.

I made a couple of other changes which also helped to get better germination this time around. First of all, I pre-moistened the soil before I put it in the pots. Such a simple thing made a big difference as the soil was evenly moist already so I didn't feel like I needed to water them so heavily to get the soil wet. I also made sure to lightly pack the soil to eliminate any air pockets and I filled the pots almost to the top so that the light wasn't blocked by the rim of the pot. I put my little paper pots into an aluminum roasting tray and marked them with wooden popsicle sticks. 

This time I placed the trays on heating pads, on the low setting for 14 hours per day. I turned the heating pads off at night since the trays are inside our home where our thermostat is set at 74 degrees F. The seeds responded to the warmth and sprouted. Last time without the heating pads I had about 2/3 of the seeds germinate. This time almost every seed germinated, they loved the warmth.

Last time I tried to water the pots from below by pouring water into the trays and placing the plastic six packs in the water. The soil absorbed the water from below but it became soggy. This time I have been watering with a plastic bottle that held dishwashing soap. 
This was something I remember seeing my grandmother use to water her seedlings. It creates a small and gentle stream of water that is easy to control and does not disturb the delicate seedlings.
I find that I have an easier time controlling how wet the soil gets if I water this way, although all those internet articles say to water from below. I hope I don't live to regret using this method, but my grandmother's garden was amazing so I'm taking her advise. She didn't have an internet, just good ole common sense. 

Keeping the trays loosely covered with plastic wrap helped to keep the moisture from evaporating. Once the seeds sprouted I removed the plastic, and placed the trays under the grow lights for 15 hours per day.

The seedlings look healthy and the paper pots are holding up well.
Because I had a low germination rate with my first batch, this time I decided to plant 2 seeds in each pot and they nearly all sprouted. The time is coming soon that I will have to thin them by snipping one seedling. That is so hard for me to do. After all, these seedlings have been nurtured and lovingly tended. I just dread it. At least this time I have some seedlings to thin! They survived and I learned a thing or two about starting seeds indoors.


Sunday, March 1, 2015

You Live and You Learn

My suggestion is: If you read several articles about starting seeds indoors and they all recommend that you sterilize your plastic seed trays before you plant the seeds, you should follow their recommendations. Learn from my mistake and don't skip this important step or your little seedlings may fall over and die like mine did. Yes, my seedlings damped off, killed by fungus. Rookie mistake.

This is my first time trying to start seeds indoors. The dream started in January while going through seed catalogues filled with promises of heirloom harvests. After lots of deliberation, the varieties were finally selected and the order was placed. Waiting for the seeds to arrive in the mail was like waiting for Christmas. The anticipation built until the package was finally delivered, filled with small seed packets which held so much hope. Yellow and pink tomatoes, fancy peppers, beans and eggplants all waiting to be carefully planted and tended. 

I made this inexpensive indoor grow light box to give my seeds the best chance to sprout early. I bought organic seed starting mix and made name tags out of wood sticks. Then I decided to skip that bothersome and yucky job of cleaning and sterilizing my reusable plastic six packs. All the articles mentioned that without this step, the plants could all die due to a fungal infection, a condition called "damping off". But seriously, would that really happen? I was so eager to get the seeds going that I opted to jump ahead and so I filled the plastic containers with seed starting mix, planted the seeds, watered them and waited.

About 2/3 of the seeds germinated and grew to about one inch tall. The excitement of seeing all those heirloom tomatoes and peppers pop up was crushed when they fell over, one by one, and died. Oh, the sadness of those tiny limp dead tomatoes! Out to the garbage the whole bunch went. 

Here's what I learned after my inaugural attempt at indoor seed starting:

Sterilizing your plant trays is recommended for a reason. 


Saturday, February 7, 2015

Making an Inexpensive Indoor Grow Light Box

In an effort to be more self sufficient, I want to start more of my vegetables from seed rather than buying plants at the nursery. Using a grow light will ensure the seeds germinate now so the seedlings will be ready for spring planting. This is the grow box I built.
I considered several ideas. At first I thought I would use a baker's rack but that would require several light fixtures (one for each shelf). Wanting to make this as inexpensively as possible, I used one 4 ft shop light and made a frame out of PVC pipe, then covered it with aluminum foil to reflect the light. The box sits on the floor in my den.
Here is what is needed to make one light box:

Two PVC pipes - 1 inch diameter, 10 ft long
Two "T" pipe couplings - 1 inch diameter
Four elbow couplings - 1 inch diameter
Shop light - 4 feet long which came with chains to hang it. Size T12
Two "daylight" bulbs which have the highest lumens I could find, also size T12.
The pipe cutters shown didn't work for this thick pipe. I used a hack saw instead (not pictured).
PCV glue
Hack saw
18 gauge wire
Heavy duty aluminum foil (18 inches wide)
Painter's tape or masking tape

First install the bulb into the fixture. Remove the tape on the end and pull the pieces out so the bulb can fit.
Align the prongs vertically and insert them into the end pieces, then rotate the bulb a half turn to lock it in place.
Carefully turn the light fixture over. Attach the chains using the "S" hooks provided.
Turn the light fixture right side up and use it to measure the how long to make the cross bar. I made my cross bar extend 3 inches longer on each side of the light. Cut the pipe using a hack saw.
Attach a "T" coupling to each end of the cross bar.
To determine the width measurements, I used my seed trays as a guide. I made the frame a little wider than the trays so the plants would not touch the foil sides. You can adjust the measurements to accommodate the trays you will be using.

Lay the cross bar on top of the tray (centered). Insert the PVC pipe into the "T" coupling, then cut the pipe even with the edge of the tray. 
Repeat on the other side of the "T" coupling to make the end pieces. Do the same thing on the other end of the cross bar and you end up with this.
Attach an "L" coupling on each end, pointing straight up. This is the one place that I used PVC glue. 
The blue PVC glue is not shown in this picture.
Without gluing that joint, the legs twisted like this, making the frame unstable. Since I wanted to be able to take the frame apart for storage, I didn't glue the other joints.
Cut four legs, mine are 17 1/2 inches long. Insert them into the "L" couplings. 
Again the blue glue is not pictured.
Turn it over and you have a frame.
Use wire to attach the light chain to the cross bar. The light should be only a couple of inches above the tray. If the light is too far away, the seedling will become leggy and fall over.
Cover the frame with heavy duty aluminum foil using painter's tape. To create a support for the foil, use 18 gauge wire from one corner to the other.
First cover the sides and back. Make sure the shiny side faces inside. The larger size aluminum foil roll was just the right width. I taped the foil to the pipe and wire frame.
Next, cover the top.
To make the "doors" cut two pieces of foil and reinforce the edges with tape like this.
Tape them to the front along the top edge only.
They can be lifted to access the trays.
I placed a plastic garbage bag on the floor to protect the floor from spills, then added a layer of foil under the trays. Turning up the edges will help to confine any spills.  
This timer is easy to use and we already had it. We use if for Christmas decorations. 15 hours of light will be adequate. 
Watering from the bottom allows the soil to be evenly moist without disturbing the seeds. Pour water into the tray and let it absorb into the soil. The pitcher  I use has a narrow spout, it's the one I use to water my Christmas tree. 
Bessie can make taking pictures a challenge.
The seeds I ordered online should be here any day. I'm ready!


Tuesday, January 27, 2015

Growing Cilantro

Cilantro is probably my favorite herb. That might be due to my love of Mexican food which often features this tasty plant. It is the one thing that we always have growing in the garden. My garden is productive all year, and by sowing cilantro seeds every month or so, I have a continual supply of delicious fresh cilantro. Lucky is the Southern California gardener! 

Plant the seeds 1/4 inches deep. Seed packages recommend spacing them 12 to 18 inches apart. I plant mine closer together because usually we eat them before they get large enough to go to seed. Mine are usually spaced 8 - 10 inches apart. I tend to plant the seeds around the perimeter of my beds. Here it is growing at the edge of this bed.
Usually I will plant about 8 plants at a time because that is the amount that we use for a month. This way we have a good supply but not so much that it goes to waste. I start planting seeds in one area of the perimeter, then the next month I plant further along the edge. That way I keep planting the seeds where cilantro has not been growing recently, moving clockwise around the edge of the bed. Rotating crops will help to prevent depleting the soil so the plants will be healthy.

The seeds of the cilantro plant are also used for cooking and are referred to as coriander. The plant is an annual, so periodically I let one plant go to seed so that the seeds can be collect to be planted later, and for cooking. The bees absolutely love the cilantro flowers which is another reason to let it go to seed. The more bees, the better!
Taken in June, this cilantro was 4 feet high and covered with tiny white flowers, and bees. (Sorry for the poor photo quality.)
Like most herbs, cilantro prefers full sun, well-drained soil and regular watering. It does best in the cool months of spring and fall. In areas with hot summers it does best in partial shade. During our very hot summers, I plant mine in the shade of the tomatoes as seen above. In warm winter areas (zones 8, 9, 10), fall planting results in vigorous plants all winter. 

The plants tend to grow quickly and it is best to harvest the plants while young. Harvest the leaves by pinching off the stems while taking care not to uproot the plant. You can prolong the harvest by taking only some of the leaves from each plant rather that stripping the whole plant at once. The plant will continue to produce leaves if you don't take all the leaves at once. 

Soon the plants will bolt, sending up flower stalks. While producing the flower stalk, the leaves become sparse. At this point, you can let the plant go to seed, or dig it up to make room for something else. I usually don't let flower stalks form unless I want to collect the seeds because the plant is taking nutrients from the soil and is really not producing good leaves anymore. One large plant that is left to go to seed will produce hundreds of seeds.

This is a plant which will reseed freely. In my garden it comes up everywhere, and that is fine with me. Right now it's growing in my compost pile.
It's happy to volunteer in the onion patch.
Why not grow around these bulbs?
I guess some people would consider this tendency to reseed a problem. Not this gardener. I need lots of cilantro to satisfy my cravings for guacamole!