Showing posts with label tomatillo trellis. Show all posts

Tuesday, June 9, 2015

Using Twine Instead of Wire on the Trellises

Trial and error had resulted in a discovery I thought I would share with you. When I made my tomato trellises, I used 20 gauge wire hung vertically for the tomatoes to climb. I was thinking wire would be stronger than twine. 
It is stronger but it is also less forgiving than twine. I've noticed areas where the wire is cutting into the vines. 

I started with one plant and removed the wire and replaced it with twine to see how it would work. Giving the twine a little extra slack allowed the vines to be gently twisted around it. The twine moves with the plant and easily conforms to the shape of the vine. On the other hand, the wire digs into the plant in some areas causing damage, so twine works better.

I made this realization after making wire trellises for all 12 of my tomatoes. It was a time-consuming process to switch the wire out and install twine supports instead, but the job is done! 
Each twisting tomato stem has one string to climb, and they are spaced about 8 inches apart along the top. I have been really consistent about pruning out all of the suckers, so there is good air circulation. 
Next time I will use twine from the start. 

You live, you learn. 


Thursday, April 30, 2015

Trellis Ideas for Tomatoes, Cucumbers, Beans, Peas, Melons and Peppers

My little garden seems to have been transformed into the land of many trellises.
And I haven't even started with the peppers.
Wood and metal, twine and wire come together in various combinations to lend support to my tomatoes, cucumbers, melons, beans and tomatillos. I thought I would share some ideas that I've tried. Some worked better than others.

Tomato Trellises
Our growing season in the Los Angeles area is very long and so we tend to have large plants. The typical tomato cages are completely inadequate for our indeterminate tomatoes which can reach 10-12 ft in a good year. Our tomato trellises need to be tall and sturdy. I have learned that it works best to have the twine or wire run vertically instead of horizontally. I have tried both, and you can train the vine to twist around the vertical wire from the ground to the top. With horizontal wires, the vines can topple over the wire and get damaged.

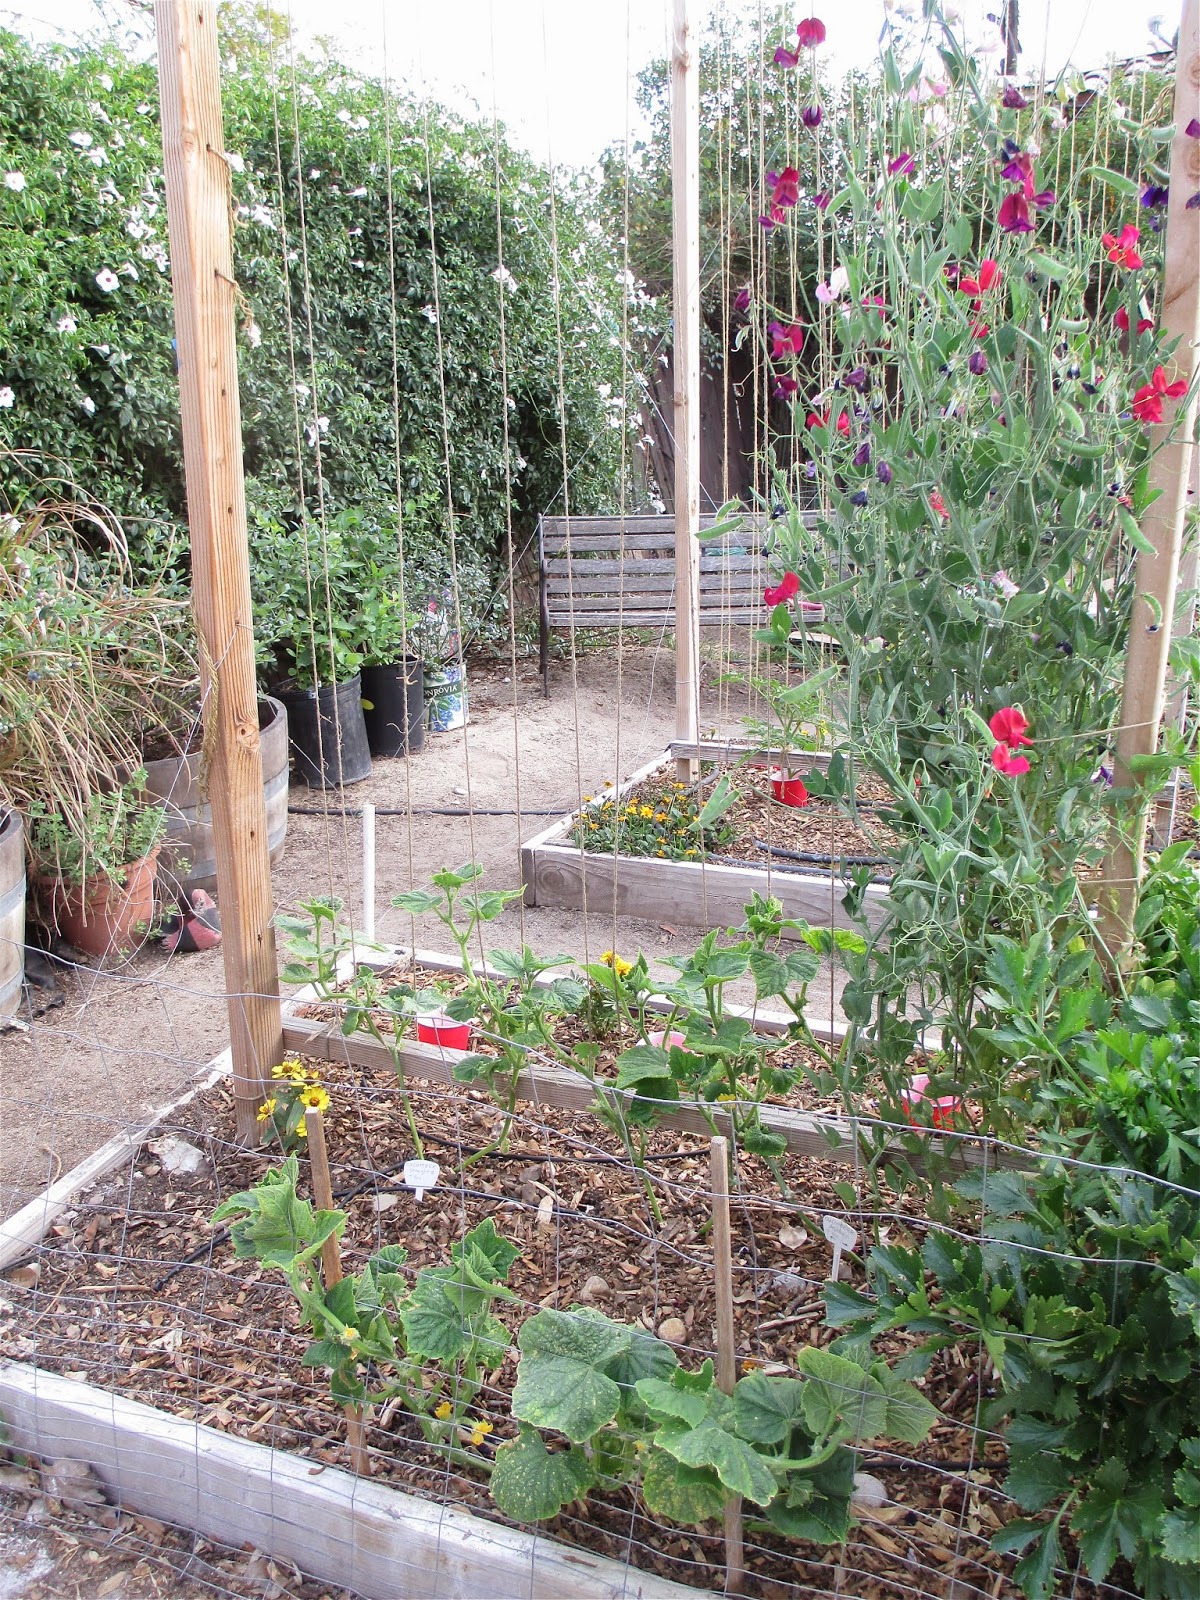
This is a wooden trellis I built last spring.
It worked great for the green beans and tomatoes last summer, and supported peas during the winter.
It is still standing strong, and this year it will support cucumbers on one side and tomatoes on the other. The horizontal twine has been removed and more vertical rows were added. The cucumbers are also planted against the wire rabbit fence which will support them nicely.
Read how to build the wooden trellis here

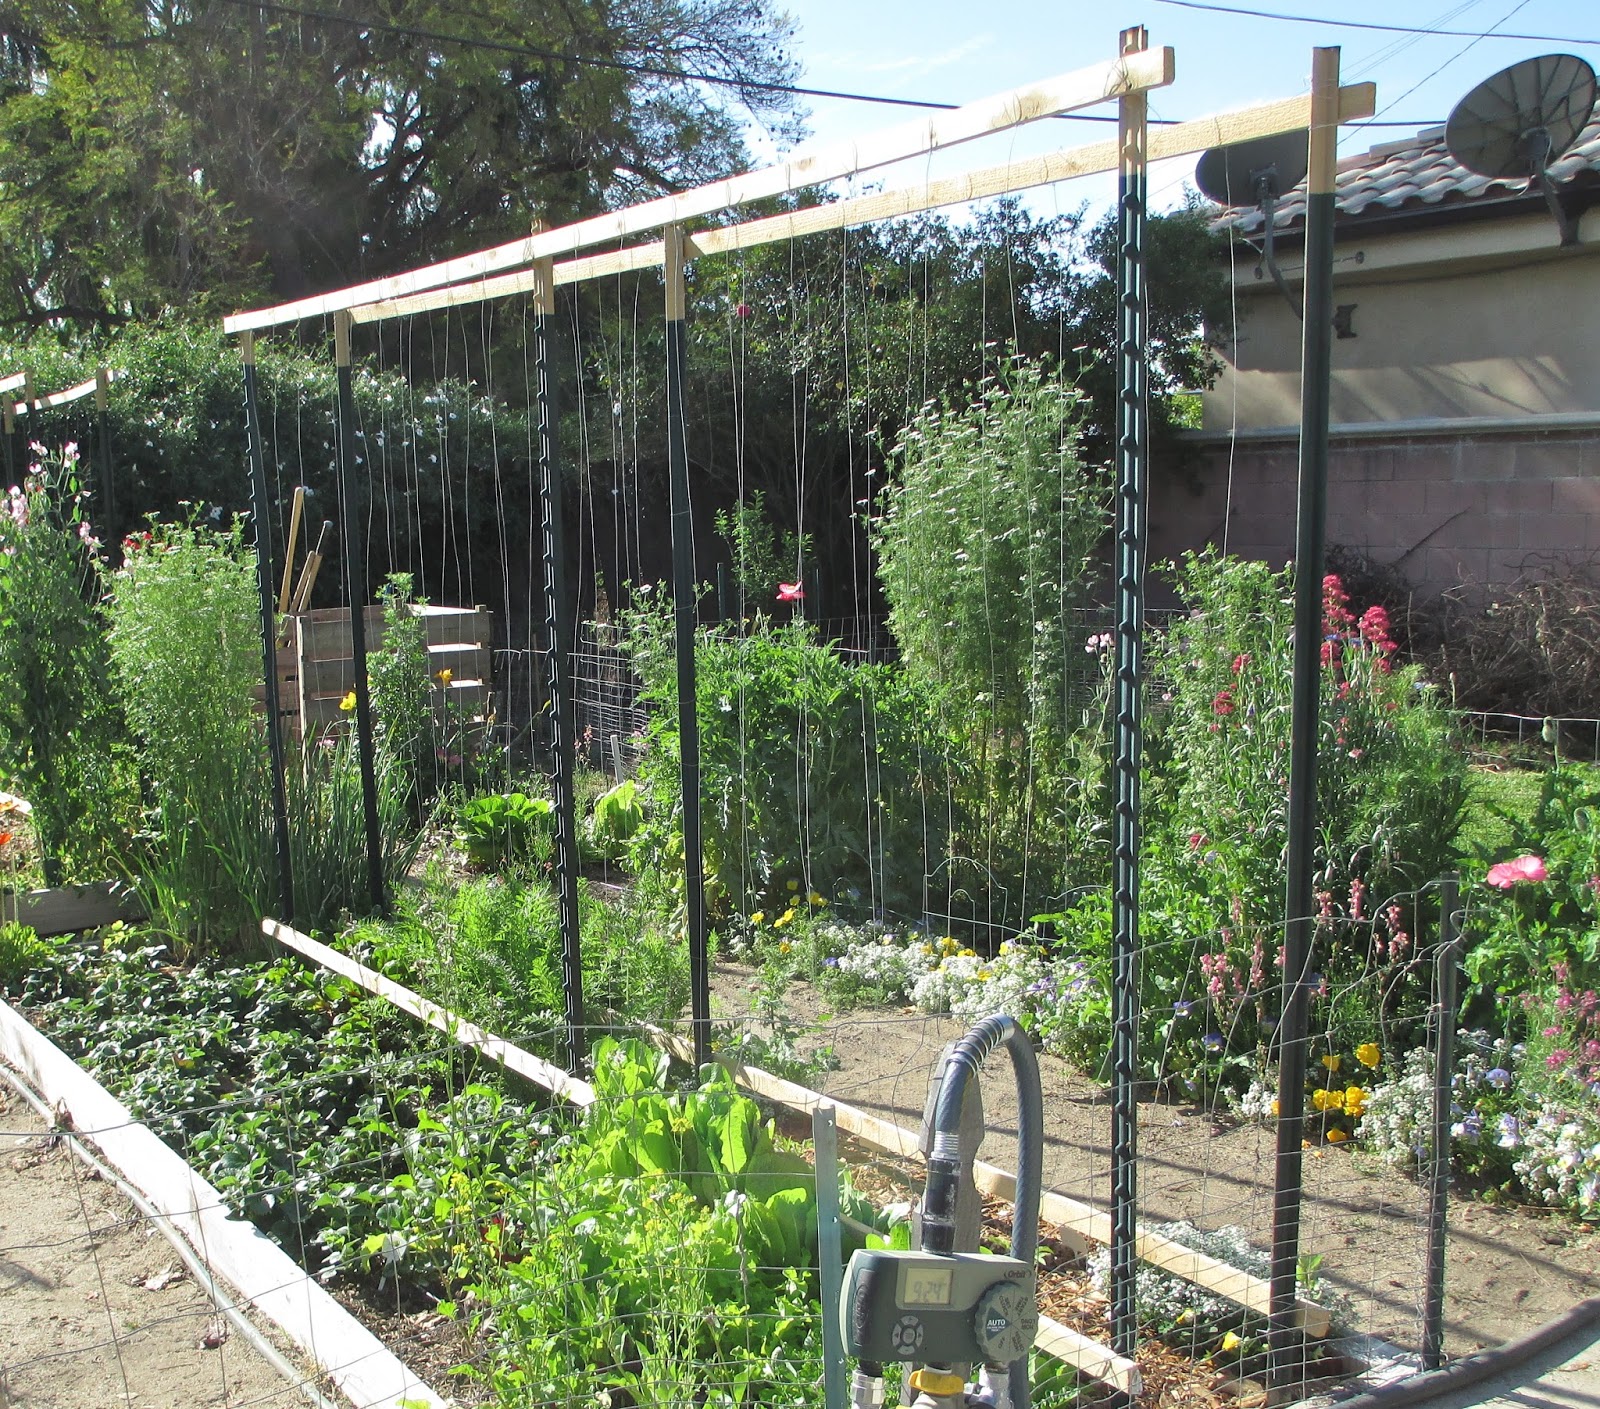
This year I tried a new design using metal stakes, wooden furring strips and wire strung vertically. This one is ten feet long and will support 4 tomatoes. Read how to make this trellis here.
The only issue I found with this design is that I planted the plants in the center and there are no wires within reach of the plants when they are young.
I added a wire attached to a small "U" shaped stake which I pushed into the soil next to the plant. 
Once the vines grow they will reach the other wires but not when they are small. For that reason, I changed the design again when I made this one.
The difference is that this one has only one furring strip on the bottom which runs down the middle. This brings the wire closer to the young tomatoes, so I prefer this one. I haven't finished putting up all the vertical wires yet, and I may just add them as needed rather than putting up lots of wire strands now.

**Update: I would recommend using twine instead of wire for the vertical supports. It is less likely to cut into the vines. Read about that here.

Here is last year's version which was made of metal stakes with wire strung horizontally.
When the tomatoes outgrew the trellises I extended them by attaching round stakes using wire.
I just kept adding rows of wire horizontally as the plants grew. You can read about that trellis here.

Bean and Pea Trellises
This year I decided to try growing my pole beans on tee pee trellises. 
Growing the green beans in succession will prolong my harvest. These two tee pees were planted 3 weeks apart. They look happy. Click here for the link to see how I made my tee pee trellis using a round pole, pvc adapter, twine and "U" hooks.
I've grown bush beans on small trellises made of metal posts with twine strung horizontally. I find that spacing the poles about 10-12 inches apart works well. I planted two rows and ended up adding additional twine as needed to keep the bushes controlled as they grew.
I've also used string trellises that were bought at a garden shop and tied between poles. 
This trellis did not work well because I used round poles which were not very stable. I tied guide wires and attached them to the raised beds but it was still unsteady. I would recommend using metal stakes with the stabilizing cross piece at the bottom instead.

Melon Trellises
Last year my melons went crazy and ended up climbing up and over the rabbit fencing that surrounds our garden.
The fence held up well under the weight of the cantaloupe and Crenshaw melons. 
This year I plan to let the melons climb their fence again. 
I am also considering adding a couple of rows of rabbit fencing running across the bed in the "spill zone" to the right. I'm thinking of two rows of fencing running from top to bottom in the photo. The melons will be trained to climb up and over which will effectively increase the area that the melons can grow. Metal stakes placed every four feet worked last year. The rabbit fencing slips into the little hooks on the stakes which makes it easy. 

Tomatillo and Pepper Trellises
Well, tomatillos can really go crazy, can't they? They are hard to tame but definitely need support, at least in my garden. I have used tomato cages, but again they are too small and my plants outgrow them. This year I planted them in the melon bed, close to the rabbit fence, so one side has support from the fence. 
I put metal stakes on the other side running parallel to the fence and strung wire horizontally to provide support on that side. To support the branches between the plants, I ran wire in a zigzag pattern both down low and higher.
If they grow higher than the posts, I will add the longer round poles like I did when I extended my tomato trellis above. If I had longer metal stakes I would have used them but these were the only posts I had left. I've used this method to support my peppers and it works well for them too.

Last year I used bamboo sticks to tame the tomatillos. 
I had some bamboo growing in pots and the dead stalks had branches which were strong enough to keep the plants loosely controlled. Sometimes the simplest things work best. Read about it here.

I hope these trellis ideas inspire you to experiment and come up with your own versions. The hard work is done in my spring garden. March and April have been busy out there, tending the soil, building supports and transplanting my seedlings. 

Grow garden, grow!!


Thursday, April 9, 2015

DIY Tomato Trellis

Every year I redesign my tomato trellises in an attempt to create better ones. This latest version is made of 8 ft metal garden stakes, 1 x 2 inch pine furring strips and 20 gauge wire. I bought 10 ft furring strips, so the trellis is 10 ft long. It uses 4 furring strips and 6 metal stakes. The wire is strung vertically so the tomato vines can be trained to twine around the wire as the vines grow. 

The metal stakes were placed 10 inches apart which will allow air to circulate between the vines to control mildew. The plants will be planted in the middle and trained to grow up the vertical wires.

My husband pounded the stakes while I used the level to be sure they were straight. We also used the level to make the tops of the stakes the same height so the trellis looks even and level. The furring strips are not perfectly straight but these were the straightest ones at the store, and since they were only around a dollar each, they are fine.

These are common metal garden stakes and they have raised ridges that the 1 x 2 inch furring strips fit between perfectly. I used the wire to tightly tie the furring strip to the stakes. 

Then I strung the wire from the top furring strip to the bottom one. The wires are spaced 6 inches apart.
This is a simple design which is much less complicated than my first tomato trellis which is made of wood and twine. Read how I made the wooden trellis here.
Tomato trellis, photo from March 2014
It is still standing and will support cucumbers and tomatoes this year. I am hoping this new trellis will work better because there are more vertical wires and having two rows of them will control the vines better than only one row of wires. At least that's what I'm hoping. I am also vowing to do a better job of pruning the tomatoes this year.  

The small tomato transplants look tiny down there, but hopefully the vines will be happy climbing up their new trellis.
Time to harvest those carrots to make room for more tomatoes...
Bessie May loves carrots.
** For an updated, improved version of this trellis, click here


Friday, June 13, 2014

Dream Big - Extending My Tomato Trellis

Trellis needs to be taller.
The time has come to extend my tomato trellis. The vines are 6 feet tall and it's only June. These are indeterminate tomatoes and their trellis is a simple one, but it needs to be taller. I'm dreamin' big.
Extended trellis gives room to grow.
I started my trellis by simply pounding 4 stakes in the ground and adding rows of wire spaced approximately every 6 inches. I use 7 ft metal garden stakes with the "T" at the bottom for stability. They have knobs spaced 6 inches apart and I wrap the wire tightly enough that the knobs prevent the wire from sliding down the stake. I was careful to make the tops of the stakes level so the wire is level which makes it look nicer.

Early in the season I start at the bottom and add a few rows of wire, then as the vines grow, I add more wire. I find spacing the wire 6 inches apart allows great support but also easy access to those huge tomatoes I plan to be picking. 
April 2014
At each end of the trellis, two stakes are placed about 12 inches apart so that after the wire is placed, there is a long cage one foot deep. In this space are two tomato plants. The trellis is about 5 feet long. 

For added stability I tie guide wires from the stakes to the raised beds.

Every few days I go along and push the new growth under the wire to keep it controlled.
Vines poking out
Vines controlled.
That's a fun little chore because it's amazing to see how fast they grow!

The problem with this trellis is that it is too short. It is not as tall as my other tomato and bean trellis which is made of wood. We are at the point in the season where I need to add extensions. Last year my tomato vines grew to 9 ft tall.
Summer 2013, with my tomatoes and sunflowers
This year I decided that I would extend the trellis to around 9 ft high. To do this I added some round garden poles which are 8 ft long. To make them the same height, I marked each pole 3 ft from the top. This mark will line up with the top of the metal stakes.

I wrapped wire tightly around the stake and pole to hold them together. 

Next I will string the wire at 6 inch intervals. Now they have room to grow.


Thursday, May 22, 2014

Taming the Tomatillo - Bamboo Trellis

Tomatillo spreading.
Around here, we love green salsa. My husband is a fabulous cook and his enchiladas suizas are just amazing. And there's nothing like fresh tomatillos to make a great chili verde.

Tomatillos are easy to grow here in my Los Angeles area garden. The problem is they get out of control. Fast. One day the plant looks robust, then suddenly it's taking over. I had to do something or my poor peppers and cucumbers would be stifled.

Being indecisive about what type of support to make, I mulled it over in my head. A couple of weeks went by and the rogue plants kept creeping over the cucumbers toward the tomatoes. Today was the day I had to do something.

I had 3 bamboo poles purchased previously at a garden center, but that didn't seem like it would be enough support.

Luckily I have some bamboo planted in pots along a fence. And as it turns out, bamboo needs occasional fertilizer to thrive in tubs. Mine are a bit deprived, so today there were plenty of dead stalks for the taking.

Originally I thought I would break off the side branches to make nice smooth bamboo poles like the ones I bought. Wrong. That stuff is tough. It doesn't break or cut easily.

Then it occurred to me to just stick it in the ground as is.
Before

After


Worked like a charm. All those little side branches hold the vines beautifully. Why didn't I think of that before? They are the perfect little trellis makers, and they are right in front of me.

Sometimes the most obvious things are the hardest things to see.

So much to discover. And now my cucumbers can see the light too.

http://andiesway.blogspot.com/2014/05/taming-tomatillo.html